Use the table conversion operation to change the format of XML data into a format that the receiving system can understand. Use table-based conversions for data such as the following:
Ship vias
Units of measure
For example, your trading partner uses the unit of measure "each." Eclipse stores units of measure as two characters. Using a table-based conversion, you can tell the system to change the unit of measure "each" to "ea" for incoming data, and to change "ea" to "each" for outgoing data. For a designated element, you can define multiple unit of measure conversions in the conversion table.
![]() To perform table-based conversion on XML data:
To perform table-based conversion on XML data:
Right-click a transaction in the Trading Partner Tree and select Edit Transaction Map to display the transaction map.
In the Target XML column of either the received map or the reply/sent map, right-click the element you want to modify and select Modify Mapping to display the XML Mapping Conversion Editor dialog box.
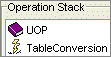
If the element you select has a source element mapped to it, the source element displays in the Operation Stack field. If the element is not mapped, the Operation Stack field is blank.
From the Operations field, double-click TableConversion to add it to the Operation Stack field.
The Table Conversion dialog box displays.
In the Convert From field, type the source data that you want to convert.
In the Convert To field, type the format to which you want to convert the source.
For example, if you are converting units of measure from your trading partner, enter a unit of measure in the format they use, such as "each" or "box," in the Convert From field. In the Convert To field, enter the two-character format of the corresponding unit of measure stored in Eclipse, such as "ea" and "bx."
Note: The information you enter for table-based conversions is case sensitive. The system looks for exactly what you type in the Convert From field. For example, if you enter "EACH" in the Convert From field, and the data in the XML document is "each" the system does not convert the data.
Repeat steps 5 and 6 to enter additional format conversions for the element.
Note: Ensure that there are no blank lines in the table as you are adding conversions.
Click OK to return to the XML Mapping Conversion Editor dialog box.
If necessary, move the operation to the correct place in the operation stack.
Typically, the table conversion operation line falls after the element that contains the data you want to convert:
Add additional sources or operations, as necessary.
Click OK to return to the mapping utility main window.
From the File menu, select Save Transaction Map to save the map.
See Also: