This is an optional feature; it is not part of the baseline system. You cannot access any of the functionality described here without first purchasing this additional package.
Before you start using Automation Studio with Eclipse, there are several important steps to follow for integrating the two systems. Your participation is crucial in this process. By collaborating effectively with your company’s staff and the Eclipse team, you can successfully integrate your Eclipse system with Automation Studio. It is essential to appoint a site administrator for Automation Studio and to involve someone from your IT department who is knowledgeable about your network.
The Integration steps consist of:
In the initial stage, after purchasing the Automation Studio license for Eclipse, the Eclipse team works behind the scenes to set up your company's Site and Environments (production and test) on the cloud-based Automation Studio website. You will receive your login credentials for the Automation Studio site via email, which will be for the primary administrator of your Automation Studio account. After you have integrated Automation Studio with Eclipse, you can add additional users to access Automation Studio.
Before accessing Automation Studio, configure Eclipse to work with Automation Studio. Since Eclipse is an on-premises system, you will use a reverse proxy and APIs to connect to Automation Studio. You also need to be prepared to add IP address to an IP Allowlist on your server. This allows Automation Studio secure access to you on-premised Eclipse system and the publicly accessible APIs. Your IT Administrator should help you with that part.
As an alternative to configuring your network setup to expose the APIs to the public internet, you can use a product such as the Workato On-Prem Agent (OPA). This is not covered in this document.
There are two areas to enter appropriate communication settings. But first, you need to set up a user in Eclipse for Automation Studio.
Configure the following Eclipse areas for Automation Studio:
During the Eclipse configuration process, establish an Automation Studio User account on Eclipse. This Automation Studio User Eclipse account will be the first user on Automation Studio as the administrator. The person you have as the Automation Studio administrator and all those given access to Automation Studio need to have the Authorization Key for Admin or SuperAmin on Eclipse to access Automation Studio. Additionally, you must set up the administrator account (Automation Studio User) on Automation Studio and give it appropriate permissions. After you have verified a successful integration by completing all the steps in this article, then you can add more Automation Studio users.
You will navigate to User Maintenance on Eclipse to set up the Automation Studio User. For detailed instructions on creating a user in Eclipse, please refer to Creating User Records in the Eclipse Help system.
Enter the API Server location in the Control Maintenance Record as follows.
From the System > System Files menu, select Control Maintenance to display the Control Maintenance window.
During this process, it is important to verify that you have an API license, since Automation Studio will not integrate with Eclipse without the use of the Eclipse APIs. You can confirm your company's access to APIs by navigating to the Eclipse API Development site and verifying your login access.
Enter the values in the API Configurations window for Automation Studio.
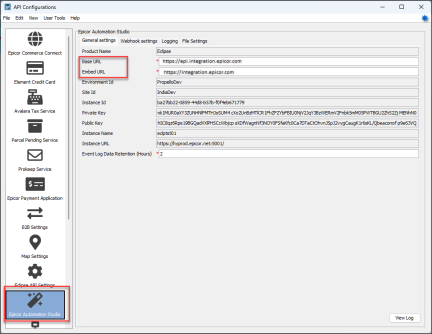
Navigate to the API Configurations window and then select the Epicor Automation Studio pane.
There are three fields that are open for configuration. The other fields are read-only fields and are automatically completed during the registration process.
On the General Settings tab, enter the Base URL to use for opening the Automation Studio Eclipse page.
https://api.integration.epicor.com
When you select the Automation Studio menu option in Eclipse it opens a separate Eclipse window that uses this URL.
Enter the Embed URL to use for the populating the Automation Studio page within the Eclipse Automation Studio page frame.
https://integration.epicor.com
In addition, verify there is a value in the Logging Hours field, even though this doesn’t directly affect the communication settings.
After you have configured Eclipse, you can log in to Automation Studio to configure it and create an Instance. Registration of the Instance performs a "handshake" with your Eclipse system to populate most of the settings on the API Configurations window for the Epicor Automation Studio pane. If you need assistance, Professional Services will work with you to create an instance, but it is not required to enlist their help.
The two areas that need to be addressed in Automation Studio are:
Create and register the Instance as follows.
Select the plus icon (Register Instance). The system displays the Register an Instance wizard page.
From the Select your product drop-down list, choose Eclipse.
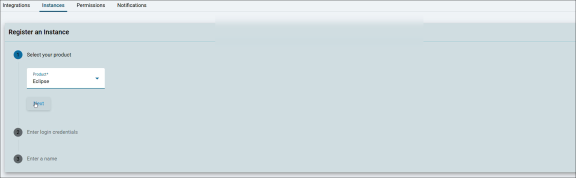
Click the Next button. The system displays a browser box.
In the Server field, enter the location address you used for the Api Server Settings control record.
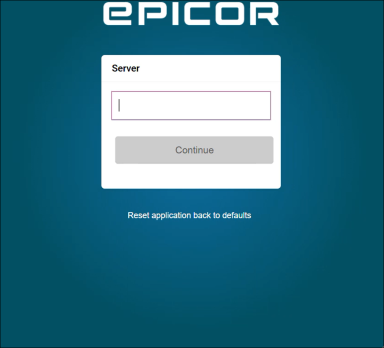
Select the Continue button.
Enter your Username and Password for the Eclipse Automation Studio user. Previously, you have set up this user in Eclipse.
Select the Log in button.
You return to the Register an Instance page. Enter a Name for your instance.
Select the Register button.
A dialog box asks if you would like to set up Automation Studio with this instance. Select Yes.
Return to the Eclipse system and open the API Configuration window.
Select the Automation Studio side menu option.
Verify on the General tab of the Automation Studio panel that the remaining fields are filled in. This occurred during a successful Instance registration. If the fields are not filled, then the registration process did not work.
Frame ancestors are populated by default when you first integrate with Automation Studio. These websites connect your system with Automation Studio, and typically, you do not change these settings. However, you should confirm that the integration process populated the frame ancestors.
Verify the Frame Ancestors as follows:
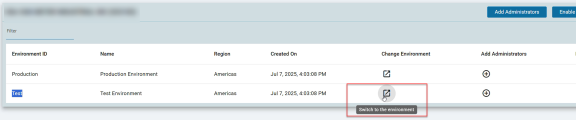
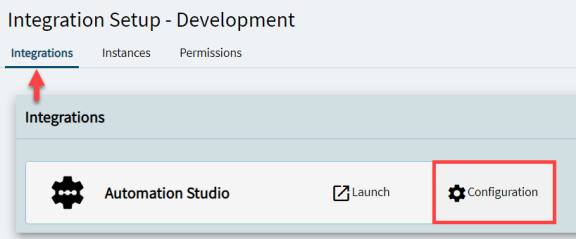
Navigate to the Integrations tab for your selected Environment.
On your Automation Studio Integrations window, select the Configuration option.
Select the Edit Frame Ancestors button.
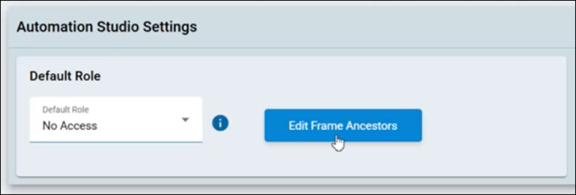
Verify that the Api Server Settings URL is on the Frame Ancestors page. Remember, this is the same URL that you have previously entered on the control record, Api Server Settings. If it is not there, then you need to add it. Select the plus button to add a line, enter the Frame Ancestor, then save your entry.
Once you have completed configuring Automation Studio and Eclipse, verify that you can access Automation Studio from within Eclipse.
Log into Eclipse as the Automation Studio user that you established earlier.
Navigate from the Eclipse Main Menu to 8 - Automation Studio.
System > System Programming > Add On Products > 8 - Automation Studio
Automation Studio opens in a separate Eclipse window.
Alternatively, you can access Automation Studio through the Solar Search bar.
If there are issues with launching the Eclipse Automation Studio window, refer to the Troubleshooting section.
In addition to the logging above, API Audit Logs record before and after changes made to many major Eclipse windows. The Audit Logs are a result of an /AuditLogs API that you can use for the Eclipse windows. This log is intended to monitor changes made to Eclipse windows as a result of Automation Studio but can used in other situations.
On the General settings tab of the API Configurations window, the Event Log Data Retention field sets the limits for how long change logs are retained.
The default for retaining the change data is one hour. If there is no entry in the Event Log Data Retention field, the system uses the default of one hour. You can set the numeric value from 1 to a maximum of 72 hours.
The File Settings tab has all API index trigger file names. You can enable and disable the index triggers by selecting the check box next to the file name.