
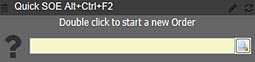
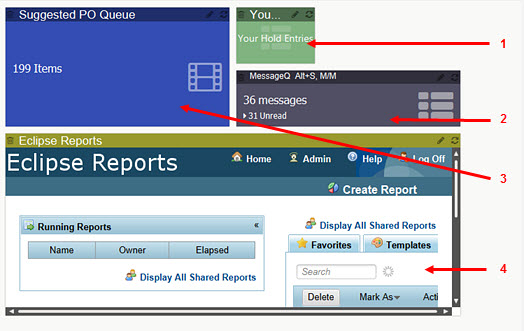
Widgets provide real-time statistics for queues and other areas that require daily monitoring at a single glance. Widgets display in the Solar Desktop and are available for most queues in the system. One of the most commonly used widgets is for Quick Sales Order Entry. This widget offers a single place to access sales orders, purchase orders, and transfers. For information, see Quick Sales Order Entry Access Overview.
Each widget contains a set of parameters that is the same as the header fields you use to populate the queue when you access it from the main menu path. For example, if you open the Outgoing Fax Status Queue using the System > Printers > Outgoing Fax Status Queue menu, you enter information in the User ID and Time Zone fields to populate and filter items in the queue. The parameters are the same for the widget associated with the queue.
See Creating Shortcuts to Menus for information about adding menu shortcuts to the Solar desktop.
To add a widget to the Solar desktop:
From the Solar Desktop menu, right-click and select Add Widgets to display the Widget Maintenance window.
Note: You can right-click in any widget field to use Cut, Copy, and Paste features for the text with which you are working.
|
Field |
Description |
|
Widget Title |
When you select a widget from the Base Widgets list, this field populates for you. Change the default title with a title that is more descriptive or to shorten it, such as instead of Suggested Purchase Order Queue, you may rename it to Sugg POQ. Note:New in Release 9.0, a base widget has been added for Eclipse Reports. |
|
Widget Size |
Select how large you want the widget
to display. See |
|
Widget Background* |
By default, the system defaults to Gray #666666. Use the drop-down list to select a different color. |
|
Flash on Change* |
Select the check box to have the Solar Desktop flash when information updates in the widget, such as when a message comes in. |
|
Widget Icon* |
Select an icon to link to the widget. The icon displays in the background. |
|
Widget Category* |
If you have categories set up on the Category Toolbar, you can select a category into which to place the widget. |
* Optional
From the Base Widgets area, select the widget you would like to add. The system does the following:
Displays the Widget Parameter s associated with the widget you selected. The parameters are the same as the header fields for the queue for which you are creating the widget.
Enters the default widget title in the Widget Title field. The widget title is the text that displays above the widget in the Solar desktop.
To enter a SQL Widget, the SQL Widget Parameters must be defined in advance.
In the Widget Parameters area, enter the parameters for the widget.
Each widget contains a set of parameters that is the same as the header fields you use to populate the queue when you access it from the main menu path. Press F9 in the fields in the Widget Parameters section to see more information about each field.
For example, if you add the Open Order Status Review Queue widget multiple times with different parameters, it might be useful to label each widget to indicate what it is displaying.
Use the Activation Key Stroke area to add a keyboard shortcut for the widget.
For example, if you want to use Alt+Ctrl+F2 select F2 in this field. Using shortcuts can help your efficiency by keeping your hands on the keyboard when using the system, rather than having to use a mouse. If you add this keyboard combination to the Widget Title, you display the shortcut on the Solar desktop:
Notes: We recommend using function keys F1 through F8. The remaining function keys (F9 through F12) are used by the system for functions that cannot be overridden, such as launching the online help.
The Use CONTROL-ALT field is not available for all widgets.
Click OK to add the widget to the Solar Desktop. The system displays a confirmation message.
Depending on the widget's function, the system may limit the available sizes. For example, Eclipse Reports requires more space on the Solar Desktop than the Open Order Status Review Queue.
The following widget sizes are available" measurements are width by height:
Tiny - 1" x 1"
Small - 3" x 1"
Medium - 3" x 2"
Large - 6" x 3"
Extra Large - 9" x 6"
Fill - Fills the entire Solar Desktop
See Also:
Working with the Solar desktop