For warehouses that frequently cutting products, such as wire or pipe, you can select the locations and lot numbers instead of allowing the system to automatically select the lots and locations. Use the Split Locations and Cut Comments options in Cut Product Entry to define different locations.
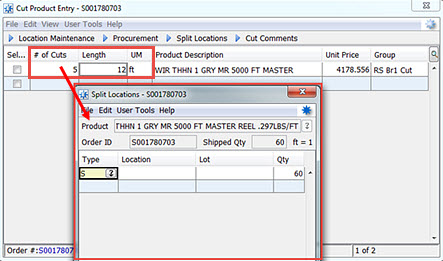
The split locations option allows you to select the locations and lot
numbers for multiple cuts on a single line item. For example, you can
enter 5 cuts at 12 feet of a product. The Split Locations window defines
the location and lot number for each cut. ![]() Click
here to see the example
Click
here to see the example
To cut a product in different locations:
Create or display the order with cuttable products.
From the Line Item menu, select Cut Product Entry and enter the cuttable product information.
From the Edit menu, select Split Locations.
Use the Type, Location, and Qty fields to indicate the cut type, location, and quantity for each cut.
The total quantity must equal the shipped quantity for the order displayed in the Shipped Qty field. The system validates the locations against Location Maintenance.
Exit the Split Locations window saving your changes.
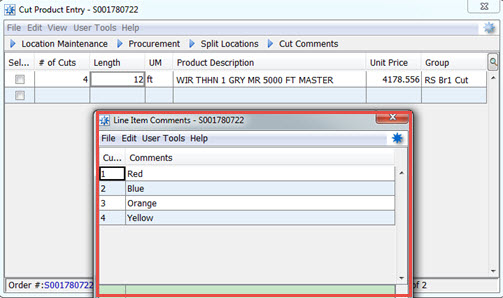
Use the Line Item Comments window to add comments for each cut. For
example, you require each cut to be color coded. Enter a comment for each
cut indicating the color that prints on the cut label. The comment is
specific to the cut, so each comment prints on the cut label as identified
on the Line Item Comments window. ![]() Click
here to see an example
Click
here to see an example
To add cut comments by cut number:
Create or display the order with cuttable products.
From the Line Item menu, select Cut Product Entry and enter the cuttable product information.
For each cut number, enter any comment needed for each cut. For example, you required each cut to be color coded. For each cut, you comment in the color required: Cut #1 - Blue cut, Cut #2 - Green cut.
Exit the window to save your changes.