The Eclipse WMS Mobile App provides a modern interface that you can use with compatible Android devices to continue to gain real-time control over your inventory.
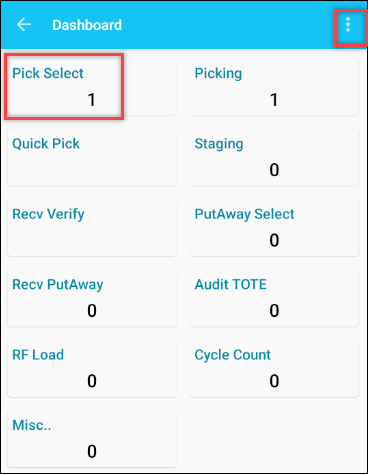
After you login, the Eclipse WMS Dashboard is the launching point for all of your warehouse activities.
Each card shows the count of tasks in each stage.
The menu button (three dots) at the top corner, gives you the option to view the settings.
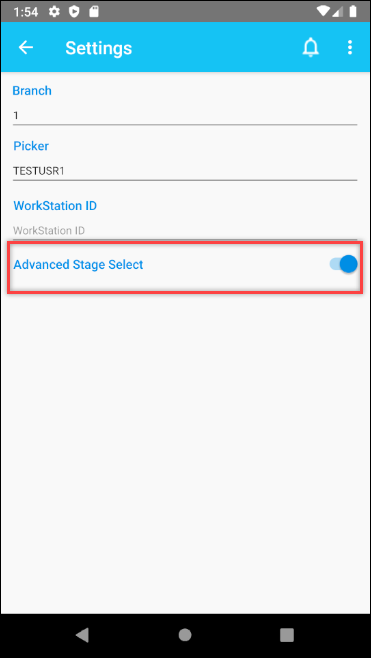
From the Settings page you can view the logged in user information, which includes the Branch, Picker, and WorkStation ID. The Terminal ID may also be available.
You can use Mobile Device Management (MDM) software to handle setting the Terminal ID and the Eclipse host for the WMS devices.
The system defaults to the user's home branch, and the logged in user ID as the picker. You can change to any branch the user has access to and you can change the picker to another that has access to the branch.
Set the WorkStation ID, if needed. If you change the WorkStation ID, you have to log out and back in for it to take effect.
You then set the terminal ID, if necessary. Choose the Terminal ID from the list whose defaults you want to use. For example, the terminal location of the printer you are using.
You can also set the Advanced Stage mode. The Advanced Stage mode changes how you view orders in relation to totes during staging.
Selecting the Pick card shows you the assigned items to pick on the Picking screen.
The top of the Picking card provides you with the product information for the item to pick, which includes Description, Location, Lot ID (if Lot Product), Order ID, UPC Code, Eclipse Product ID, Qty and UoM.
Use the arrow buttons to switch to a different order.
The system may provide an
Information icon that you can select anywhere in that product data
section to see additional information about the item to pick. It displays
Product Description, Line comments and Shipping Instructions, if present,
and User Defined values if they’re set up and have values assigned.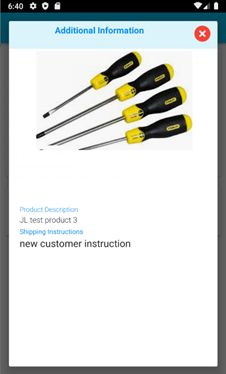
You are prompted for the information type in the field with the Next button. The field name prompts for Scan Product, Enter Qty, Scan Location, and Scan Tote.
The Current Quantity field displays the stock availability at the warehouse location selected.

Selecting the Pick Select card takes you to the Pick Select screen where you can see all of your assigned pick tasks. The picks display according to the priority assigned to them.
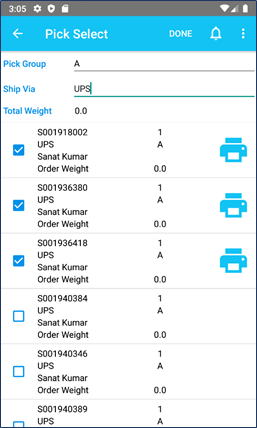
Depending on your picking
process, you may have users assigned to specific ship vias when they
are picking material. In which case, you can select the appropriate
one from the Ship Via list. Use RF User Ship Via Priority to limit
ship vias by user and prioritize which ship vias the pickers should
handle first. 
If you want to see unassinged pick tasks, in the Pick Group field select "All" open tasks. This allows you to select unassigned tasks to pick if you choose.
To print the ship ticket, select the print icon next to the order or select the menu icon to choose Print All Assigned Orders.
After selecting the items, go directly to the Picking card by selecting the check mark at the bottom corner of the window.
On the Staging page you can see the orders that have been picked and are ready to be staged. During the Staging process, the system can present tote scanning in two ways. Tote scanning varies depending on activation of the Advanced Stage Select option, which is found in the Settings option of the Dashboard menu.
When
Advanced Stage Select not activated, you select the orders associated
with the tote. Enter or scan the tote and proceed to close the task.
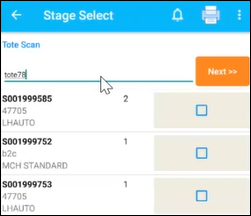
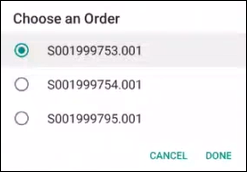
With Advanced Stage Select
activated, the system displays orders with the totes and you select
a single order within the tote before you proceed to close.
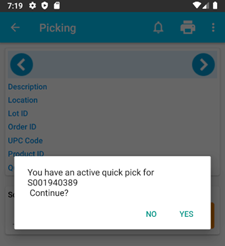
With the Quick Pick feature, you can select products to pick that should be done right away. The selected products are assigned a Quick Pick ID and each time the Quick Pick card is accessed the system prompts to pick orders assigned a Quick Pick ID first. You scan your product or manually enter the product ID.
When you select the Quick Pick card the system displays the Pick Select screen, which allows you to assign orders for Quick Pick. Quick pick orders are assigned a Quick Pick ID. Once you select the order it returns to the Quick Pick screen with the order information displayed, ready for you to pick the order. You cannot exit the screen until the order is picked.
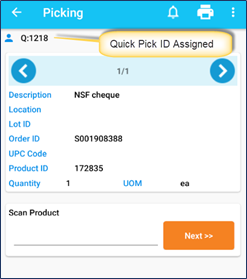
If there are active Quick Picks, then selecting the Quick Pick card prompts you to work those items first.
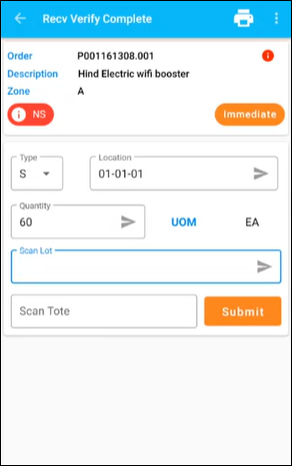
The number of items to receive are in the Recv Verify tile. These items can also be found in the Eclipse system on the Warehouse In Process Status Queue. During the receiving process, you can scan the items, verify the quantity received and the system validates the quantity against the original order. On the Recv Verify Complete card you can view product details by selecting the top section of the card. You can use the button for immediate receiving of items and skip the PutAway Select step. You can print labels during receive and putaway. The menu icon in the top corner, you have additional options for PU IDs. Unverified Select, Check For Open Orders, and UOM Inquiry.
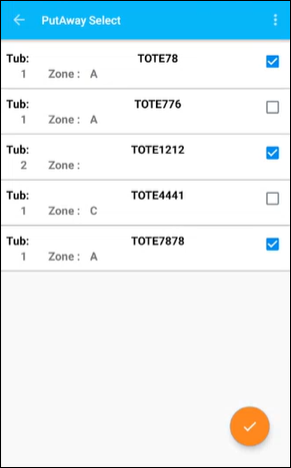
After you complete the Receive Verify process, items are now in the PutAway Select stage. The number of items (totes) in this stage appear in the PutAway Select tile on the Dashboard. Using PutAway Select you see the items that you have assigned to you for put away and also modify the list by adding or removing items assigned to you.
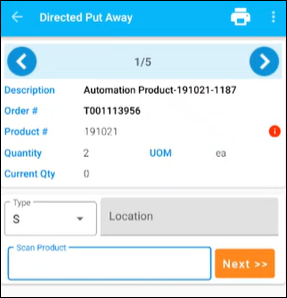
After you finish assigning items to yourself, you are now in the Receive PutAway stage. The number of items in this stage appear in the Recv Put Away tile on the Dashboard. During the Putaway process, you can conduct a directed putaway and a nondirected putaway. You can print labels during receive and putaway.
The Directed Put Away card leads you through a process to scan the product, enter the quantity, scan the location, and scan the lot, if needed.